

Need to make quick changes to your faxes? Want an online PDF editor for a document you’re faxing?
Fax.Live’s fax editor makes it easy to sign and edit any fax. The fax editor is included in the Fax.Live digital faxing platform. Not only can you edit and sign your faxes, but you can also send and receive faxes without a fax machine. Simply upload a PDF, make your edits, and then send it to any fax number. You can also receive faxes from others, sign or edit them, and then send them right back!
Read on to learn about the great features of the Fax.Live editor, how they work, and what they could be used for. First up: How do you edit a fax?
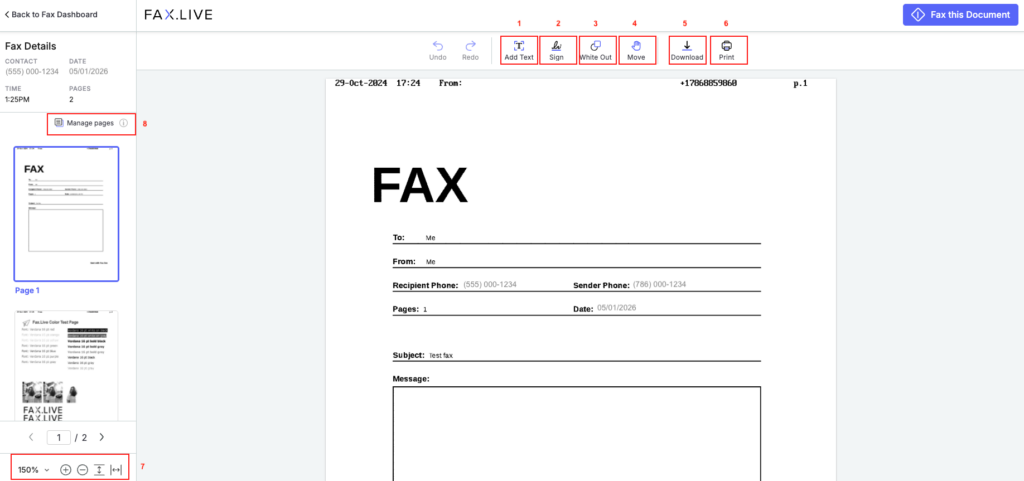
How to Edit a Fax
Fax.Live lets you edit faxes you’ve sent and received. If you want to make major edits to a document before faxing it, we recommend editing it while it’s still on a document editor like Microsoft Word or Google Docs before exporting it as a PDF.
If you have minor edits, the Fax.Live online editor is perfect.
In the Fax.Live dashboard, under the Fax Activity tab, select one of the faxes that you’ve sent or received. Hover over the three vertical dots under Actions. You will see a pencil icon, which is for editing a Fax.

Click to open the Fax.Live fax editor. This editor allows you to make some quick edits to documents, including:
- Adding text to a fax
- Signing a fax
- Whiting out areas on a fax
- Adding, removing, or rearranging fax pages
Add Text to Fax
At the top of the Fax.Live editing toolbar, click the Add Text button. This is the tool for adding additional text to a document. You can then customize the font, size, text color, and resize it to better fit your fax. With the Add Text tool selected, your cursor will change to a + sign, which indicates you can click and drag to create a text box on your fax.
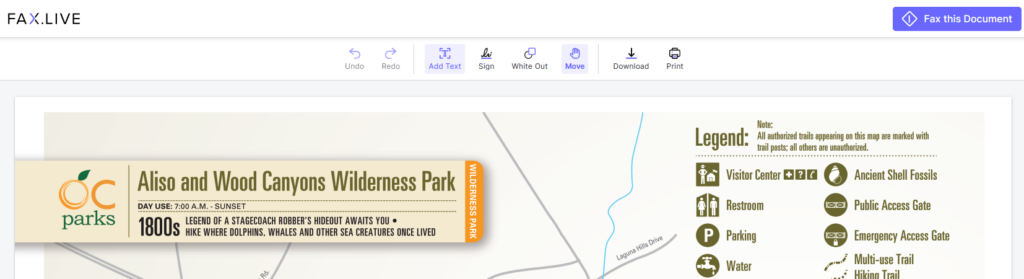
We’ve created a text box, which you can see in the screenshot, and typed text into it. As you can see, the entered text doesn’t match the font and style of the original faxed document perfectly.
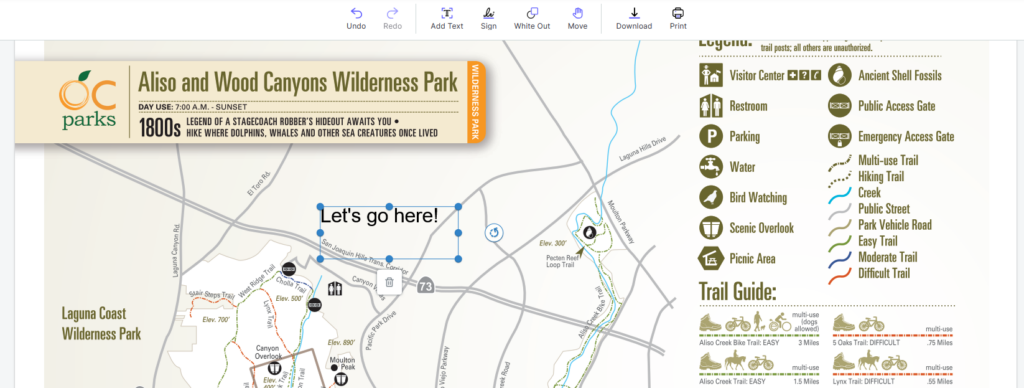
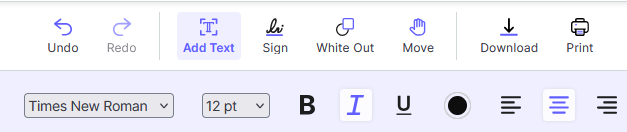
We can change the formatting settings of this text box by double-clicking it. The Add Text tools are available on the editing menu from left to right:
- Changing the font
- Increasing or decreasing the text size
- Making the text bold
- Italicizing the text
- Underlining the text
- Changing the text color
- Swapping the text orientation to left, center, or right
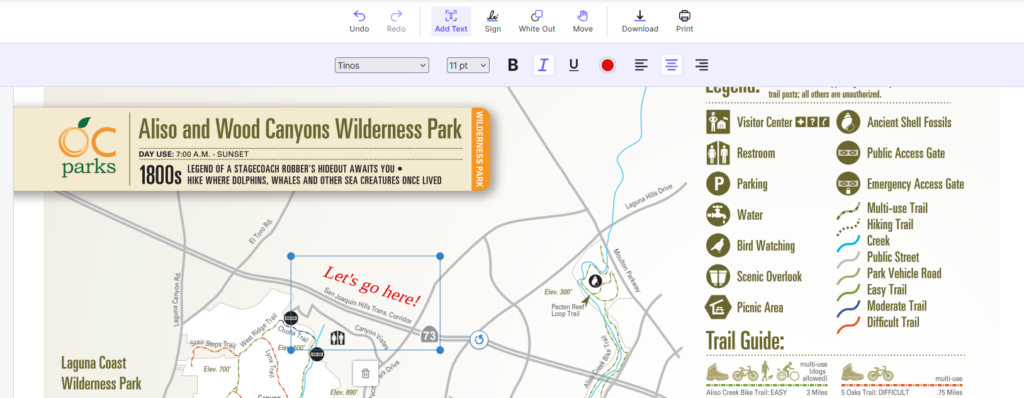
In the third screenshot, not only have we changed the font, size, and color of the text, but we’ve also rotated it and changed the text box’s position. We rotated the text by clicking and dragging the circular arrow next to the text box. The text box itself can be moved by clicking and dragging it with the Move tool selected in the toolbar.
You can remove any text boxes you create by clicking the trash can icon.
Add a Signature to a Fax
Add signatures to faxes with the Sign tool. Create new signatures for your document or paste signature images anywhere on your document.

Let’s put an example signature on our document by clicking the New Signature button. This feature has 3 ways to sign a document:
- Draw a signature using your cursor
- Type out your name and get an approximation of a cursive signature
- Upload an image of your signature
See How to Sign a Fax for a step-by-step tutorial on how to add your signature to a fax.
White Out Text in a Fax
Need to quickly remove or redact a part of a document? The Fax.Live whiteout tool is the easiest way for you to do this!
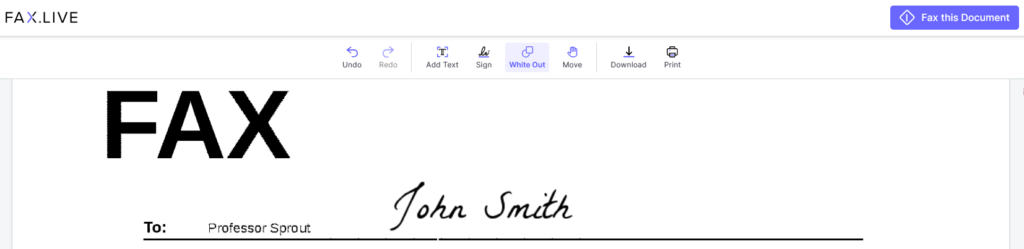
In this example, we want to redact the original name on the “To:” line. Click the White Out button on the Fax.Live toolbar. Your cursor will turn to a + sign, indicating you can now white out a piece of text or image by clicking and dragging anywhere on your document.
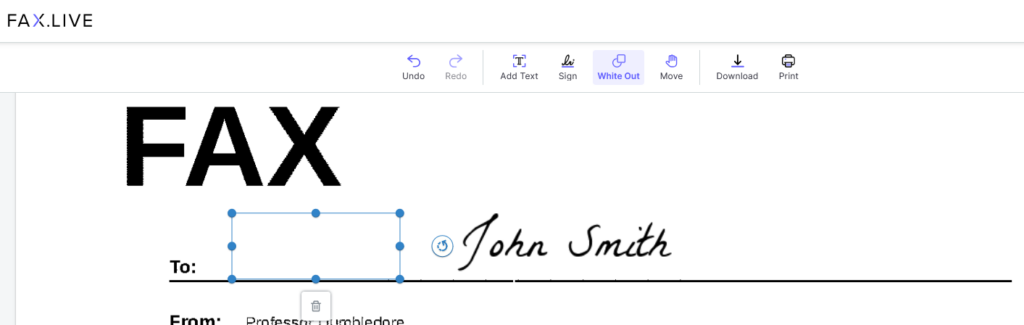
We’ve created a white box over the original name using the white-out tool. This box can be moved around again by clicking the Move button and then clicking the white-out box. You can also rotate the white-out box by clicking the circular arrow icon or delete it by clicking the trash can.
Add, Move, or Delete Fax Pages
The left side of the Fax.Live editor is reserved for page management. Clicking the i next to Manage pages gets us a preview of what can be done with this tool.
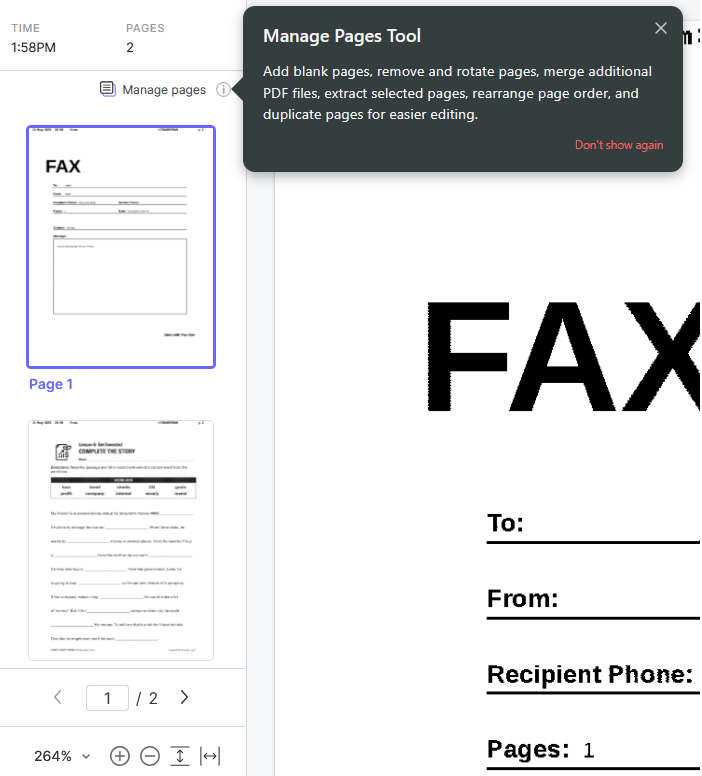
First, let’s Add a page by clicking the Add Blank Page at the bottom of the list of our fax pages.
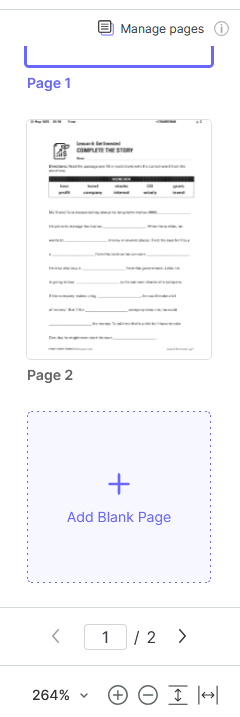
This blank page will automatically be added at the end of our fax. Let’s move it.
To add, remove or rearrange existing pages, select the Resend icon.

From Review Your Pages, select Arrange to move or delete pages. Select Add Page to upload another PDF to add to the fax.
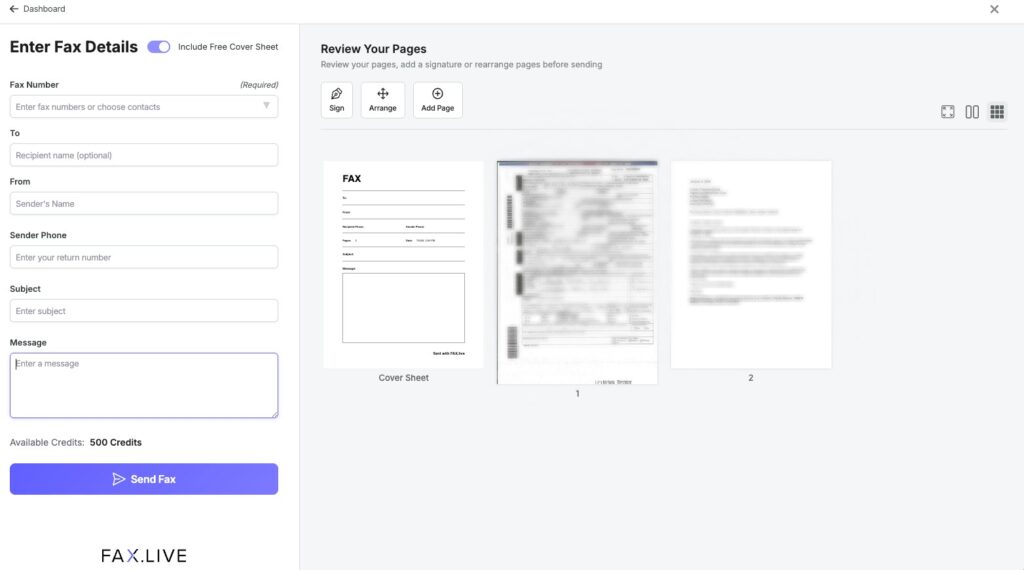
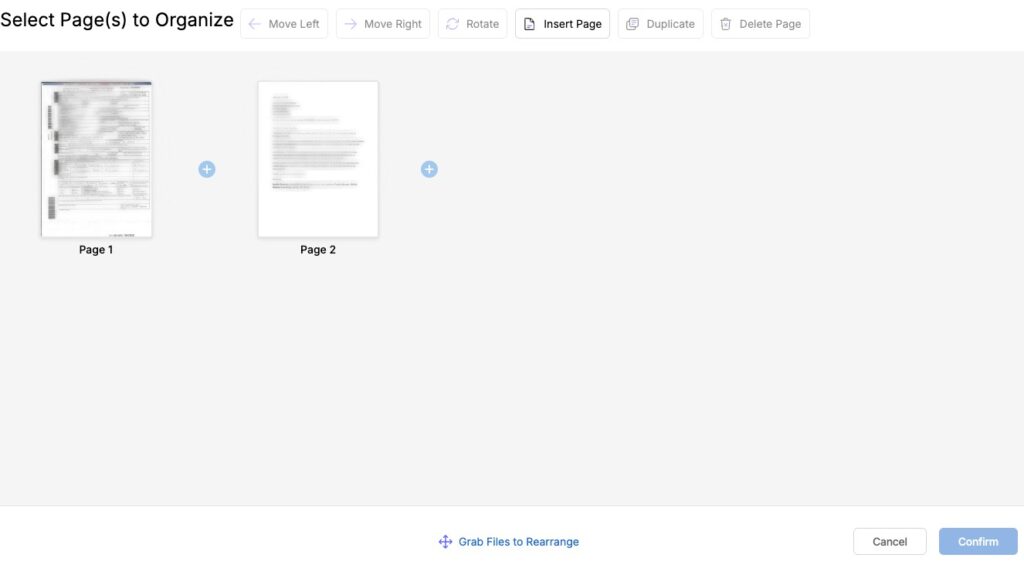
Once you’ve finished, click Confirm and proceed with sending the fax.
For more features of Fax.Live, see What Does Fax.Live Do?