

With an active Fax.live account, your dashboard makes fax management easy:
- Unlimited history of all sent and received faxes
- Actions for sent and received faxes, including editing, signing, and resending
- Fax contacts for quick, easy faxing to frequent contacts
How Fax.Live’s Reporting Dashboard Works
Communication is key when you send and receive faxes, and Fax.Live makes it easy to access your fax transmission history.
- Unlimited fax storage: Every active account with Fax.Live includes unfixed cloud storage limits for sent and received faxes.
- Print fax receipts: Easily download and print faxes and your send receipts.
- Email notifications: In addition to your dashboard, you’ll receive email notifications about all sent and received faxes.
- Contacts: Save contacts’ fax numbers to your account for easy, frequent faxing.
- Account management: View your current Fax.Live plan and phone number, manage billing, and manage your subscription all in one interface.
- Fax editing: Make simple edits to your faxes and sign documents before faxing.
Fax.Live’s easy-to-use interface eliminates cryptic error messages that fax machines are known for, such as “out of memory” or “fax result ng,” which, in case you’re curious, means “no good.”
You’ll never have to worry about memory space with Fax.Live, thanks to our encrypted, cloud-based solution. We cap individual fax file sizes at 50MB — because the larger a fax, the longer it takes to send — but we don’t have a specific storage space cap on your online account. If your subscription is in good standing, you’ll be able to easily access your entire fax history through your dashboard, which lists all sent faxes, received faxes and their details (number of pages, fax numbers, and statuses).
To view your fax management dashboard, sign in to your account and select Dashboard.
Quick Takes About Fax Reporting Dashboard
Can I delete faxes from my dashboard? Yes, you can delete sent and received faxes from Fax.Live. See the More Info section below to learn how.
Will I be able to print my fax report? Yes, when you receive a fax confirmation, you can print it. This post explains how to download and print from Fax.Live.
How long do you keep my faxes? Your faxes are saved in your Fax.Live dashboard until they’re deleted or you cancel your Fax.Live account.
What to Expect with Fax.Live’s Dashboard
Your Fax.Live dashboard serves as your activity hub, summarizing all of your sent, received and in-process faxes. Log in and select the Dashboard button on the left side of your screen. Or select 📥 Inbox to view all received faxes, or ↗️ Sent to view all sent faxes.
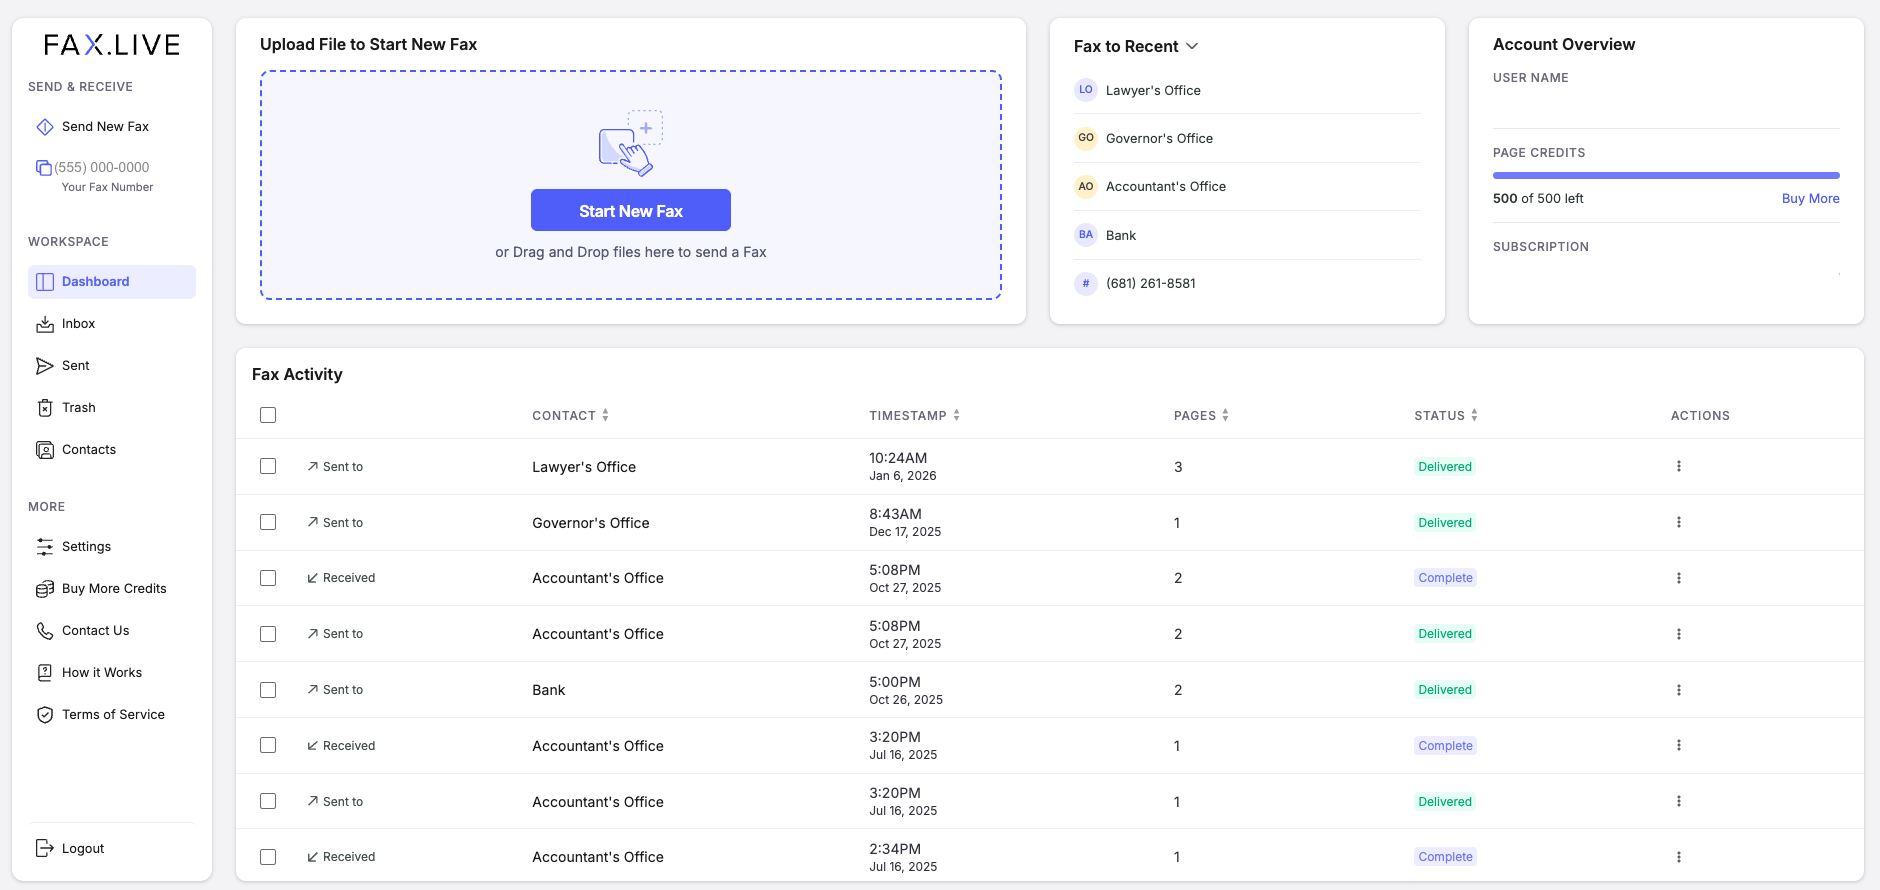
Start your first fax
- Click Send New Fax in the Fax.Live interface.
- Drag and drop a PDF version of your document into the Fax.Live interface.
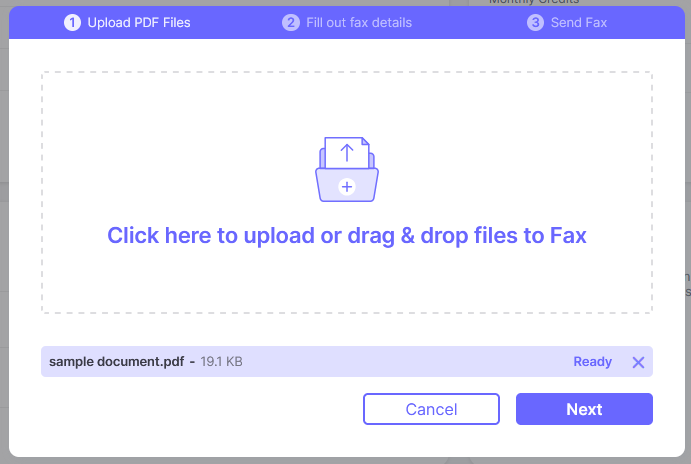
- Click Next and enter the recipient’s fax number. Alternatively, select a recipient from the Contacts list.
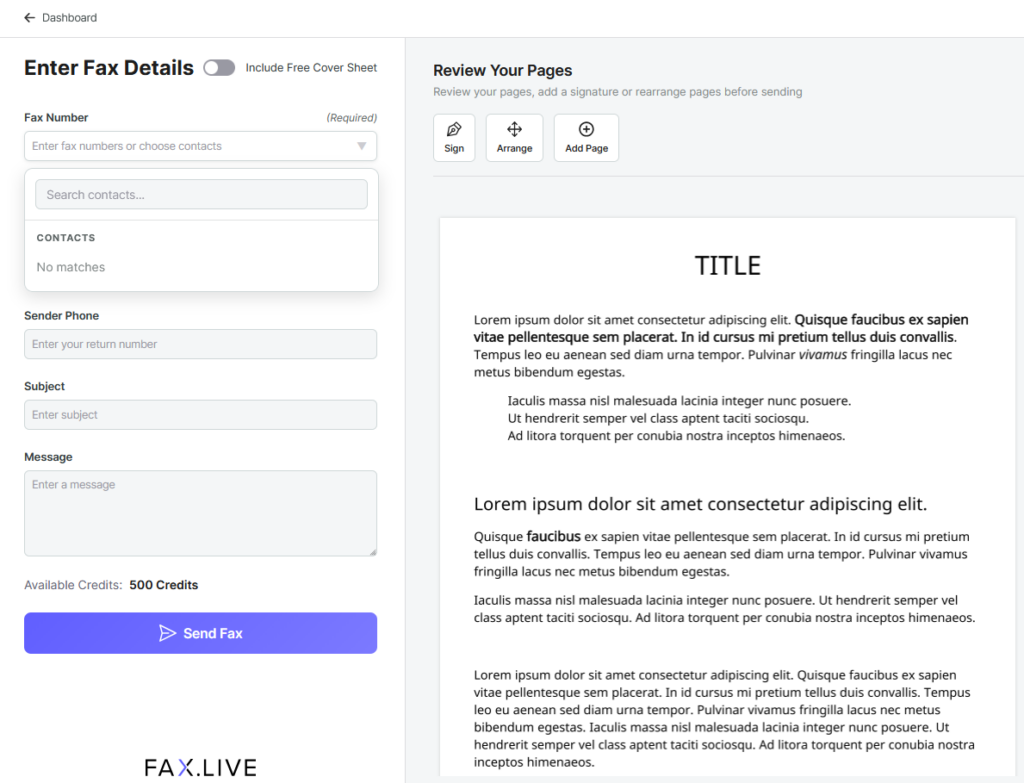
You can also add an optional fax cover page, which is a page inserted in front of your document that gives the recipient some extra information about your faxed document.
- Click Send Fax once you’ve entered the recipient’s number. Fax.Live will begin transmitting your fax and send you a confirmation email when it’s been successfully sent.
Buy more credits
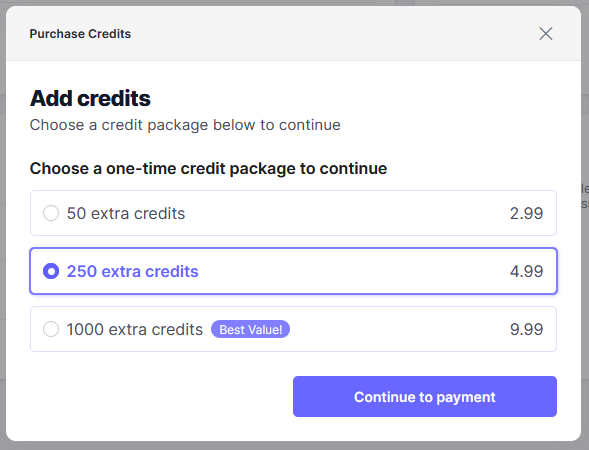
With a Fax.Live subscription, your account will get monthly credits. One credit is equal to one page, so the higher the page count, the more credits to send. Your credits will refill every month with an active subscription.
If you need to buy more credits than your monthly allotment, click Buy More Credits in the Fax.Live interface under the More section. You can then purchase additional credits. We offer quantity discounts for buying extra credits.
Manage your account
If you want to view your subscription, change the email that your faxes are sent to, or manage any other account information, select the Settings option under the More section.
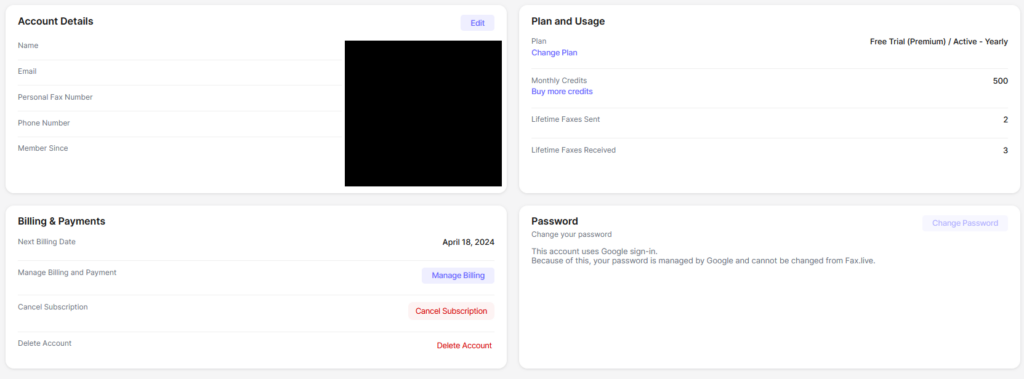
Here you can view:
- Your account details
- Billing information (including canceling your subscription and deleting your account)
- Subscription plan details
- Your account password
Manage your contacts
Fax.Live has made frequent faxing more convenient with the Contacts tab, found under the Workspace area of the Fax.Live interface.
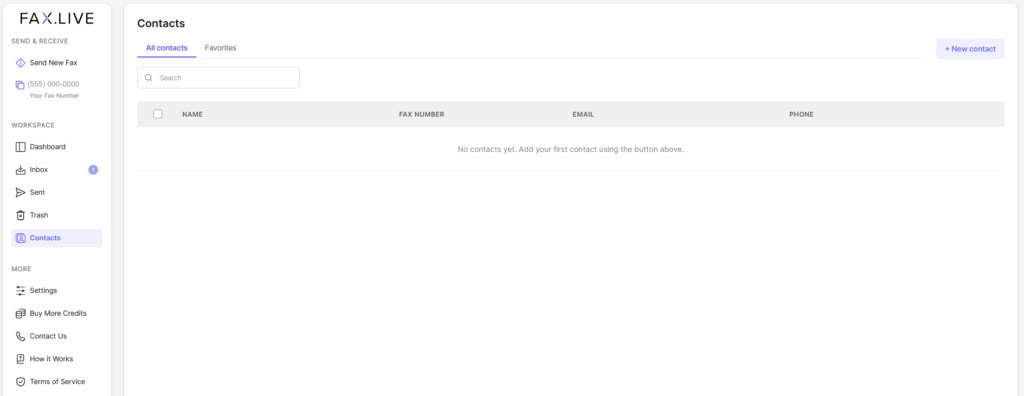
Here, you can create contacts for fax numbers that you fax to. When sending out a new fax, you’ll have the option to select a contact to send your fax to rather than entering their fax number every time. Click +New Contact in the top right corner of the Contacts page to add a contact.
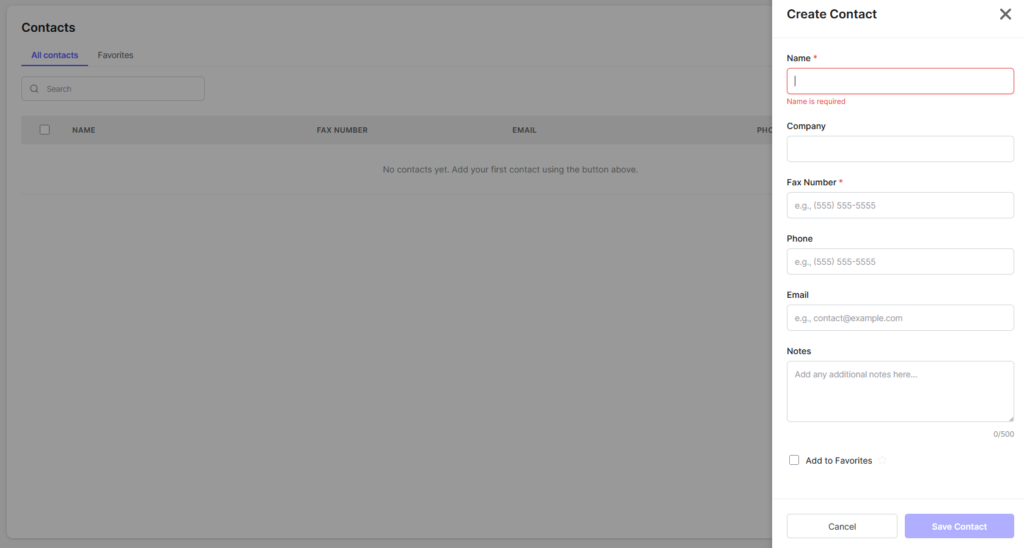
To save a new contact, a name and fax number are required. You can add additional information about the contact, including their phone number, email, and any additional notes to help identify them. This is especially useful for company Fax.Live accounts where multiple users are utilizing Fax.Live.
See your fax activity
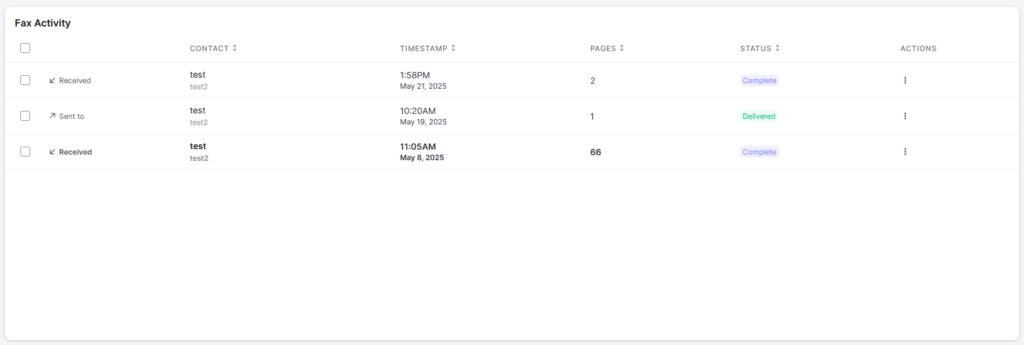
View your sent and received faxes in the Fax.Live activity log. You’ll find a complete history of all your fax activity, such as who sent you a fax and when. We also provide the status of the faxes, information about how many pages are in the fax, and management tools for downloading past faxes you sent.
Use the contacts feature to view your fax activity as contacts. With this function, you can sort your fax information by contacts to find the faxes you’re looking for.
Resend faxes
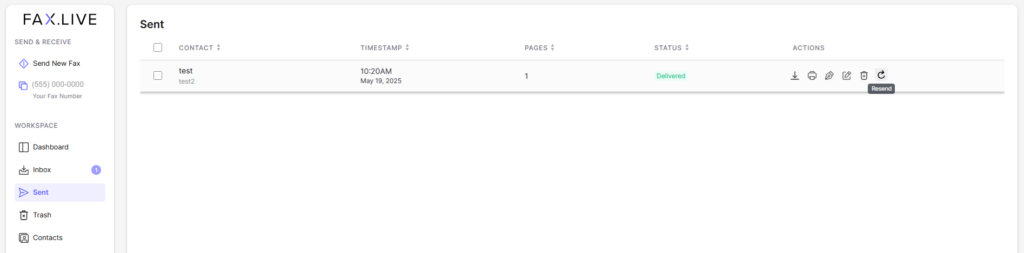
If you need to send a fax again, head over to Fax.Live’s Sent tab and click the Resend button under the actions. This will attempt to resend your fax to the recipient or contact. If you’re having trouble getting your fax through, check out our fax troubleshooting guide.
Delete faxes
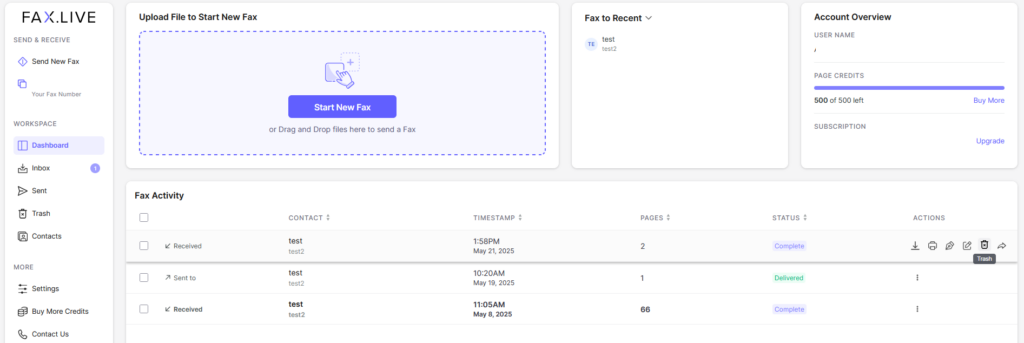
Trash unwanted faxes under the Fax Activity area, which stores all of your fax history. Under the Actions tab, you can click Trash to move a fax to the trash, which is where you delete your faxes.
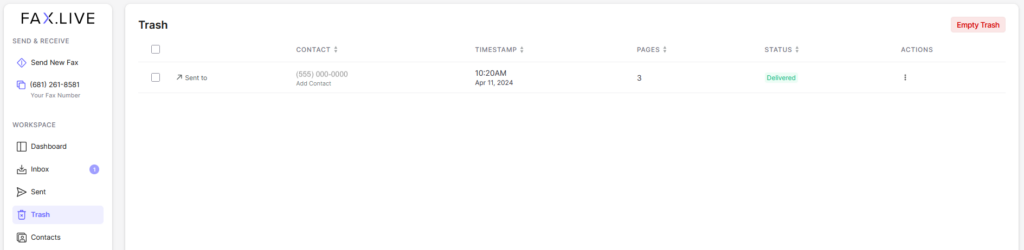
In the Trash area under the Workspace, you’ll see all of the faxes that you wanted to remove. You can click Empty Trash to permanently delete all of the faxes that you’ve put in the trash. This allows you to delete one or more faxes at a time.
Edit a PDF
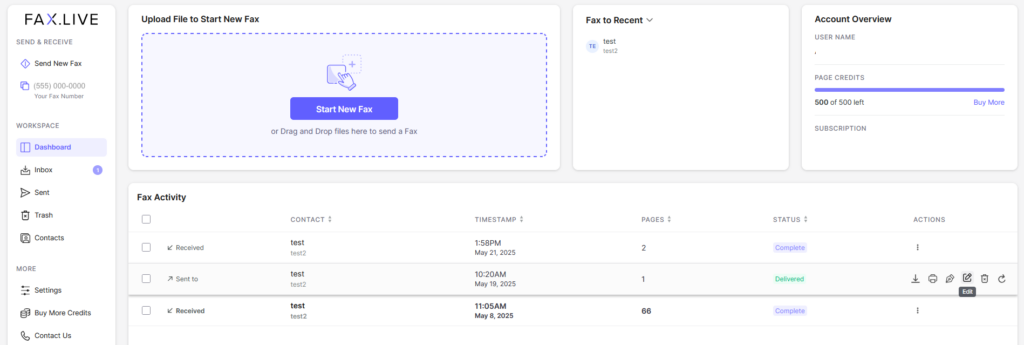
Fax.Live makes quick edits easy with the fax Edit tool, found under the Actions tab of Fax Activity.
Fax.Live’s editor works with PDFs that you’ve uploaded. The editor allows you to make simple edits to your faxes, such as:
- Adding text
- Signing
- Whitening out text
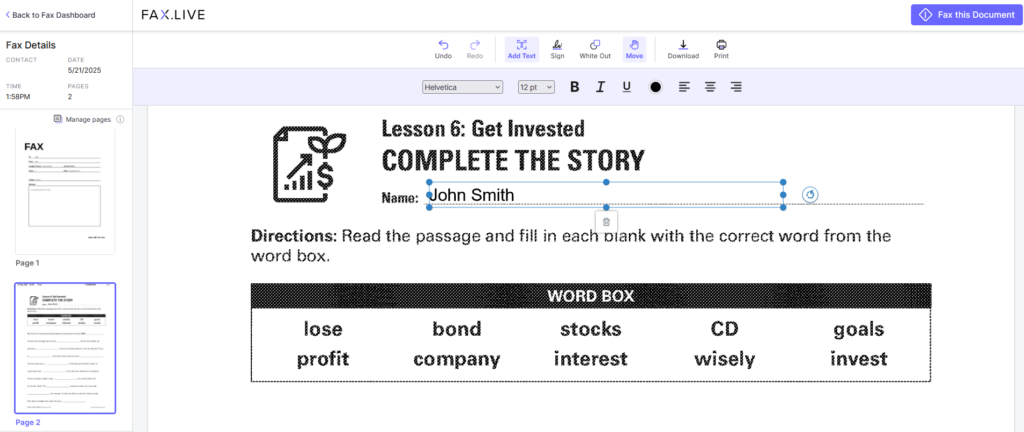
In the following screenshot, we’ve added text to a PDF. You can change the font, text size, and formatting settings in this menu. Once you’ve made all of the changes that you want, click Fax this Document at the top of the editor to fax the document with your changes made.
Sign a PDF
While we’re in the PDF editor of Fax.Live, let’s check out the Sign tool, which adds a signature to a document that you’ve uploaded to Fax.Live. You can either add a signature to a document that you’re faxing out or edit a document sent to you, sign it, and then fax it.
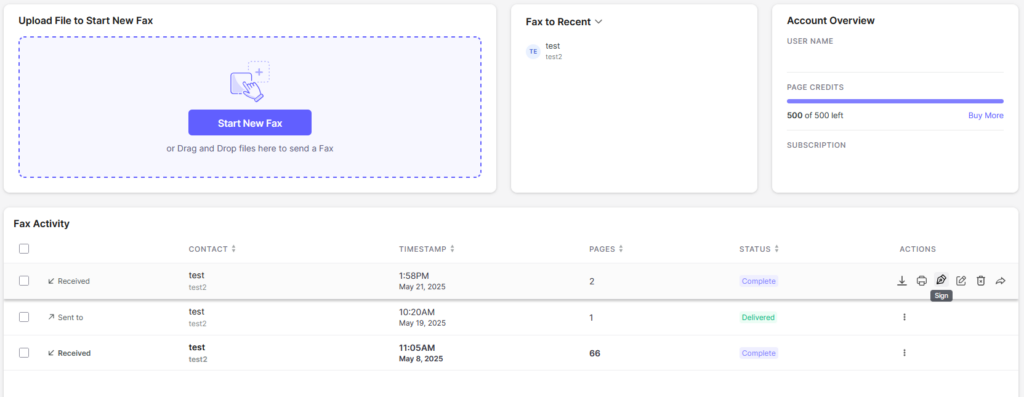
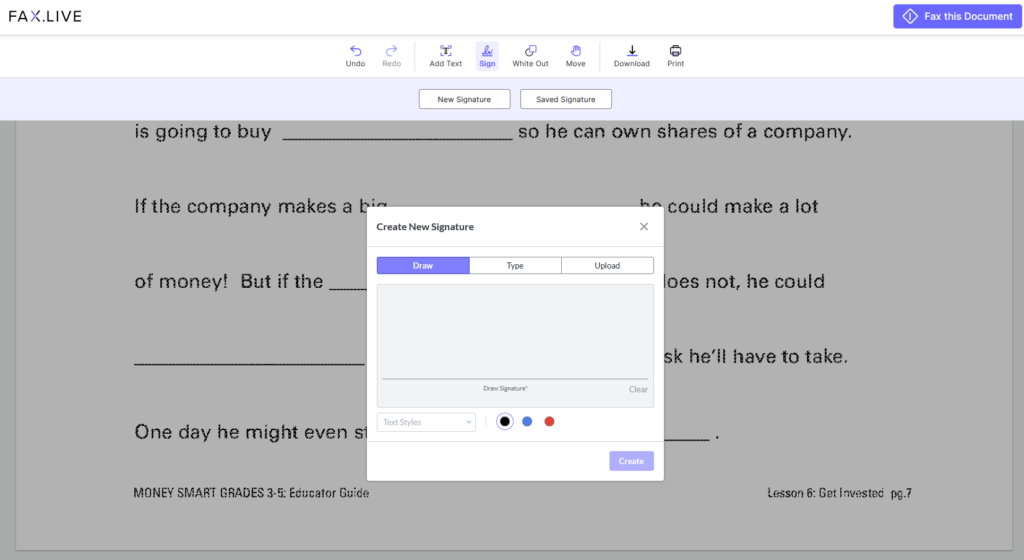
Either select Sign under actions or follow the steps to edit a document under the Actions tab of your faxes and select Sign to get started creating a signature. Click New Signature and draw, type, or upload a picture of your signature.
Once you’ve created your signature, your cursor shows a preview of how the signature will look placed on your document. Click where you want your signature placed and adjust as necessary.
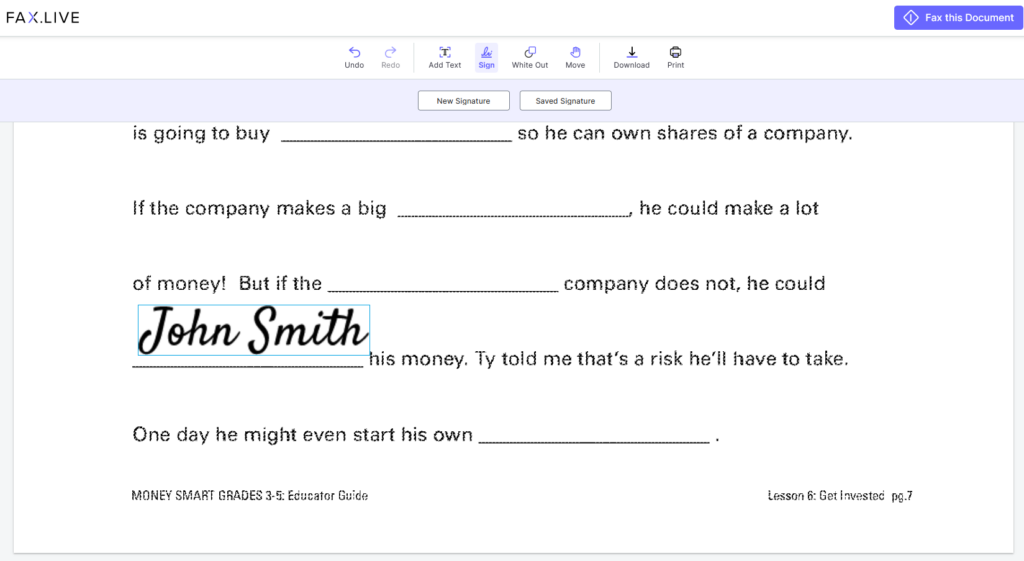
From here, you can save the PDF to your Fax.Live dashboard, download it or select “Fax this Document” and send it.